Assignment
- Design and, with the help of 3D printing and/or laser cutting, create a kinetic structure. By definition, such a structure contains at least 3 parts with a mechanical linkage or transmission between them. Ideally, your structure/sculpture/mechanism should also have a practical function.
Kinetic Structures
I decided to create something I could use in my final project. The best idea I had was a gear transmission for a DC motor that would drive the main and side brush. Both rotate at different speeds and around different axes. Perfect, right? I have an 11k RPM motor, ChatGPT estimated about 500RPM for the brush, so about a 20:1 transmission ratio. A worm gear transmission works best for such a big ratio. Let’s do it!
Design
I used the GF Gear Generator plugin from Autodesk’s website (available for free). You can find it there to generate the worm gear. I optimized parameters for good 3D printability. The most important was a 30° pressure angle.
Then I added holes for the motor and some screws to attach the brush, plus a compact enclosure to house everything. I designed it to be 3D-printable, so it’s made of several parts (three parts: a motor case and two halves).

Fusion 360 model
Animating in Fusion 360
I also tried animating the gear, which is tricky, but this tutorial helped me figure it out.

3D Print Optimization
Beyond strategically splitting parts and adding holes for screws: I used a 0.2mm clearance for any moving parts, including space for the motor. I modeled its shape separately, because I’ll use the same motor in a “turbine” for a vacuum system. Around the rotation axis on both sides, I made a 0.5mm gap. I also added rings to serve as spacers, reducing friction, which is crucial in 3D prints.
Pro Tip: Screws
- Quick and dirty = straight into plastic: same diameter as the screw (e.g. M3 = 3mm).
- Through-hole: 0.2mm or more clearance.
- Strongest, most repeatable connection = use heat-inserts.
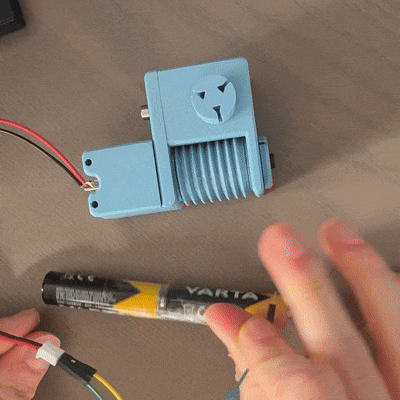
Printing & Assembly
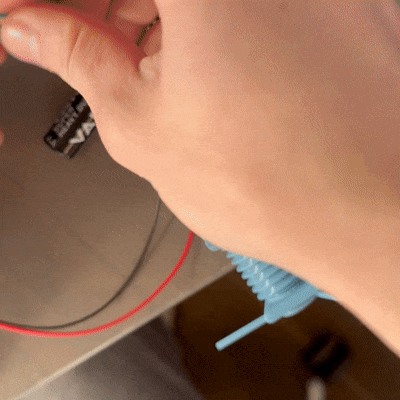
I printed the parts on the “Nexter” printer with a good PETG profile and cooling. Everything fit nicely, which surprised me. After some tinkering, adding heat-set inserts at the bottom of the worm gear and into the future main brush body, plus some screws, I mounted the motor.


Conclusion
When I connected the power source, the mechanism spun! Yay! It’s a fairly simple kinetic structure, but I look forward to looking what everyone brings at the show-and-tell. Betting it will be cool. It’s a crucial part of my final project, which is quite ambitious—it’s essential to plan ahead, as the final project is the most important part.
Demo
As you can see, the mechanism works! I’m happy with the result, but I’ll need to make some adjustments. The motor is weak, it might not be ideal to directly drive anything that might get stuck on an obstacle outside as it would mean the main brush stopping as well. The worm gear works perfectly and will give the main brush good speed and some torque to hopefully fling debris into the vacuum.